
随着公司的壮大,公司的业务越来越多,随意开发的项目也就越来越多。为了方便测试和开发能够更高效的管理接口服务,所以开源的YApi工具诞生,YApi能够帮助开发者轻松的创建、发布、维护API,YApi还为用户提供了优秀的交互体验,开发人员只需要利用平台提供的接口数据写入工具以及简单的点击操作就可以实现接口的管理。git地址:https://github.com/YMFE/yapi
YAPI环境
废话不多说了,开始准备环境,官方要求nodejs,mongodb,git。mongodb安装方法可以参考:https://www.wulaoer.org/?p=255 。nodejs安装方法可以参考:https://www.wulaoer.org/?p=745 git直接使用yum安装即可,下面是官方版本要求:
- nodejs(7.6+)
- mongodb(2.6+)
- git
如果使用的是源码包安装的mongodb,需要配置一下环境变量:
[root@wulaoer.org ~]# vim /etc/profile
......................................
export MONGO_HOME="/usr/local/mongodb"
export PATH=$MONGO_HOME/bin:$PATH
这里环境千万不能写错了,写错了就什么命令都使用不了了。如果写错了,就使用vim命令修改回来
[root@wulaoer.org ~]# /usr/bin/vim /etc/profile
环境配置好之后,需要给mongodb创建一个用户并给库授权,方便YApi连接mongodb,首先进入mongodb,切换库就是创建库,设置密码并赋予权限。
> use yapi
switched to db yapi
> db.createUser({user: "yapi", pwd: "123456", roles: [{ role: "dbOwner", db: "yapi" }]})
Successfully added user: {
		"user" : "yapi",
		"roles" : [
				{
						"role" : "dbOwner",
						"db" : "yapi"
				}
		]
}
>
YApi环境已经准备完成。
YApi安装
安装YApi,官方提供了两种安装方法,我使用的是第一种安装方法,第二种下载时间太长了,不过方式差不多,个人认为。下面是第一种方法:
[root@wulaoer.org ~]# cd /opt/
[root@wulaoer.org opt]# npm install -g yapi-cli --registry https://registry.npm.taobao.org
/usr/local/bin/yapi -> /usr/local/lib/node_modules/yapi-cli/bin/yapi-cli
/usr/local/bin/yapi-cli -> /usr/local/lib/node_modules/yapi-cli/bin/yapi-cli
+ yapi-cli@1.5.0
updated 1 package in 14.394s
[root@wulaoer.org opt]# yapi server
在浏览器打开 http://0.0.0.0:9090 访问。非本地服务器,请将 0.0.0.0 替换成指定的域名或ip
提示,使用浏览器打开,然后访问,填写YApi的配置信息。

配置完信息,点击部署。我这里选择的是最高版本,在初始化mongodb的过程中出现连接mongodb信息错误:
> core-js@2.6.11 postinstall /opt/my-yapi/vendors/node_modules/core-js
> node -e "try{require('./postinstall')}catch(e){}"

#如果这里出现错误,需要升级一下nodejs,全局升级:npm install -g n
 npm WARN mongoose-auto-increment@5.0.1 requires a peer of mongoose@^4.1.12 but none is installed. You must install peer dependencies yourself.
npm WARN sass-loader@7.3.1 requires a peer of webpack@^3.0.0 || ^4.0.0 but none is installed. You must install peer dependencies yourself.
npm WARN react-slick@0.15.4 requires a peer of react@^0.14.0 || ^15.0.1 but none is installed. You must install peer dependencies yourself.
npm WARN react-slick@0.15.4 requires a peer of react-dom@^0.14.0 || ^15.0.1 but none is installed. You must install peer dependencies yourself.
npm WARN slick-carousel@1.8.1 requires a peer of jquery@>=1.8.0 but none is installed. You must install peer dependencies yourself.


 added 334 packages from 331 contributors in 32.187s


3 packages are looking for funding
  run `npm fund` for details


依赖库安装完成,正在初始化数据库mongodb...

> yapi-vendor@1.8.7 install-server /opt/my-yapi/vendors
>  node server/install.js


Error:  (node:6436) DeprecationWarning: current Server Discovery and Monitoring engine is deprecated, and will be removed in a future version. To use the new Server Discover and Monitoring engine, pass option { useUnifiedTopology: true } to the MongoClient constructor.
这个错误的解决方法:
先停掉yapi server,在上面提示安装的路径下/opt/my-yapi/vendors,进入目录中,
[root@wulaoer.org opt]# cd my-yapi/vendors/
[root@wulaoer.org vendors]# vim server/utils/db.js
..........................................................
function connect(callback) {
  mongoose.Promise = global.Promise;
  mongoose.set('useNewUrlParser', true);
  mongoose.set('useFindAndModify', false);
  mongoose.set('useCreateIndex', true);

  let config = yapi.WEBCONFIG;
  let options = {useNewUrlParser: true, useCreateIndex: true, useUnifiedTopology: true}; #22行增加了useUnifiedTopology: true

  if (config.db.user) {
	options.user = config.db.user;
	options.pass = config.db.pass;
  }
.............................................................................
我使用低版本的时候不需要修改这个,不过安装成功后创建空间总是提示函数不能使用,有部分插件没有自动安装。修改好之后,继续按照提示的安装。
[root@wulaoer.org vendors]# node server/install.js
/opt/my-yapi/vendors/server/install.js:15
	throw new Error(
	^

Error: init.lock文件已存在,请确认您是否已安装。如果需要重新安装,请删掉init.lock文件
....................................................................
会提示已经安装过了,所以需要把/opt/my-yapi目录下的init.lock文件删掉,删除之后继续执行上面的命令。
[root@wulaoer.org vendors]# rm -rf /opt/my-yapi/init.lock
[root@wulaoer.org vendors]# node server/install.js
log: mongodb load success...
(node:6464) UnhandledPromiseRejectionWarning: Error: 初始化管理员账号 "admin@admin.com" 失败, E11000 duplicate key error collection: yapi.user index: email_1 dup key: { : "admin@admin.com" }
	at /opt/my-yapi/vendors/server/install.js:146:17
	at processTicksAndRejections (internal/process/next_tick.js:81:5)
(node:6464) UnhandledPromiseRejectionWarning: Unhandled promise rejection. This error originated either by throwing inside of an async function without a catch block, or by rejecting a promise which was not handled with .catch(). (rejection id: 1)
(node:6464) [DEP0018] DeprecationWarning: Unhandled promise rejections are deprecated. In the future, promise rejections that are not handled will terminate the Node.js process with a non-zero exit code.
安装提示错误,这个是在提示错误之间已经初始化mongodb造成的,我们可以把mongodb中yapi库的内容删除掉。
> use yapi
switched to db yapi
> db.dropDatabase()
{ "dropped" : "yapi", "ok" : 1 }
删除mongodb中的yapi库的数据,在执行就不会报错了。
[root@wulaoer.org vendors]# node server/install.js
log: mongodb load success...
初始化管理员账号成功,账号名:"admin@admin.com",密码:"ymfe.org"
提示安装成功,这里会发现用户和密码是前面配置好的,也是登录的用户和密码,不过数据已经删除了,配置信息没有,刚刚在浏览器填的数据信息保存在。
[root@wulaoer.org vendors]# cat /opt/my-yapi/config.json
{
   "port": "3000",
   "adminAccount": "admin@admin.com",
   "db": {
	  "servername": "127.0.0.1",
	  "DATABASE": "yapi",
	  "port": "27017",
	  "user": "yapi",
	  "pass": "123456"
   },
   "mail": {
	  "enable": false,
	  "host": "smtp.163.com",
	  "port": 465,
	  "from": "***@163.com",
	  "auth": {
		 "user": "***@163.com",
		 "pass": "*****"
	  }
   }
}[root@wulaoer.org vendors]#
yapi服务已经安装好了,但是启动需要使用pm2启动,如果不了解pm2的可以参考一下官方推荐的pm2用法。
[root@wulaoer.org vendors]# pm2 start server/app.js --watch 2
[PM2] Starting /opt/my-yapi/vendors/server/app.js in fork_mode (1 instance)
[PM2] Done.
┌─────┬────────┬─────────────┬─────────┬─────────┬──────────┬────────┬──────┬───────────┬──────────┬──────────┬──────────┬──────────┐
│ id  │ name   │ namespace   │ version │ mode    │ pid      │ uptime │ ↺    │ status    │ cpu      │ mem      │ user     │ watching │
├─────┼────────┼─────────────┼─────────┼─────────┼──────────┼────────┼──────┼───────────┼──────────┼──────────┼──────────┼──────────┤
│ 0   │ app    │ default     │ 1.8.7   │ cluster │ 5864     │ 118m   │ 0    │ online    │ 0%       │ 69.1mb   │ root     │ enabled  │
│ 1   │ app    │ default     │ 1.8.7   │ cluster │ 5871     │ 118m   │ 0    │ online    │ 0%       │ 77.5mb   │ root     │ enabled  │
│ 2   │ app    │ default     │ 1.8.7   │ fork    │ 6692     │ 0s     │ 0    │ online    │ 0%       │ 17.4mb   │ root     │ enabled  │
└─────┴────────┴─────────────┴─────────┴─────────┴──────────┴────────┴──────┴───────────┴──────────┴──────────┴──────────┴──────────┘
[PM2][WARN] Current process list running is not in sync with saved list. Type 'pm2 save' to synchronize or enable autosync via 'pm2 set pm2:autodump true'
意思是使用root用户开启了两个pm2容器以后重启都可以使用pm2重启或者关闭,这里我已经重启过了,原本应该提示访问端口:3000
[root@wulaoer.org vendors]# pwd
/opt/my-yapi/vendors
[root@wulaoer.org vendors]# pm2 stop server/app.js
[root@wulaoer.org vendors]# pm2 restart server/app.js
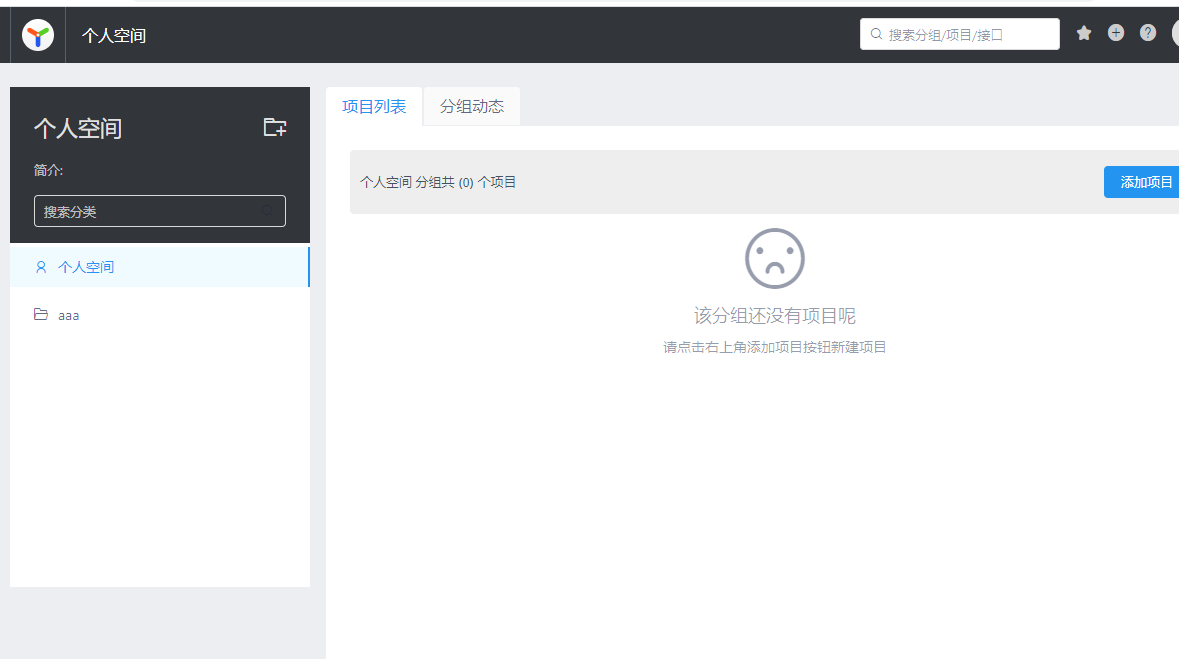
启动服务之后,我们验证一下创建的内容。使用方法参考:
https://hellosean1025.github.io/yapi/documents/index.html
这算是安装成功了,下面看看第二种方法,需要下载项目文件,这个时间有点长。
git clone https://github.com/YMFE/yapi.git vendors //或者下载 zip 包解压到 vendors 目录(clone 整个仓库大概 140+ M,可以通过 `git clone --depth=1 https://github.com/YMFE/yapi.git vendors` 命令减少,大概 10+ M)
cp vendors/config_example.json ./config.json //复制完成后请修改相关配置
cd vendors
npm install --production --registry https://registry.npm.taobao.org
npm run install-server //安装程序会初始化数据库索引和管理员账号,管理员账号名可在 config.json 配置
node server/app.js //启动服务器后,请访问 127.0.0.1:{config.json配置的端口},初次运行会有个编译的过程,请耐心等候
如果升级yapi可以进入项目后直接升级
cd  {项目目录}
yapi ls //查看版本号列表
yapi update //升级到最新版本
yapi update -v v1.1.0 //升级到指定版本
邮箱配置文件也是在
[root@localhost vendors]# cat /opt/my-yapi/config.json
{
   "port": "3000",
   "adminAccount": "admin@admin.com",
   "db": {
      "servername": "127.0.0.1",
      "DATABASE": "yapi",
      "port": "27017",
      "user": "yapi",
      "pass": "123456"
   },
   "mail": {
      "enable": false,
      "host": "smtp.163.com",
      "port": 465,
      "from": "***@163.com",
      "auth": {
         "user": "***@163.com",
         "pass": "*****"
      }
   }
}[root@localhost vendors]#
配置LDAP登录,也是上面的文件中添加
{
  "port": "*****",
  "adminAccount": "********",
  "db": {...},
  "mail": {...},
  "ldapLogin": {
      "enable": true,
      "server": "ldap://l-ldapt1.com",
      "baseDn": "CN=Admin,CN=Users,DC=test,DC=com",
      "bindPassword": "password123",
      "searchDn": "OU=UserContainer,DC=test,DC=com",
      "searchStandard": "mail",    // 自定义格式: "searchStandard": "&(objectClass=user)(cn=%s)"
      "emailPostfix": "@163.com",
      "emailKey": "mail",
      "usernameKey": "name"
   }
}
参数详解:
enable 表示是否配置 LDAP 登录,true(支持 LDAP登录 )/false(不支持LDAP登录);
server LDAP 服务器地址,前面需要加上 ldap:// 前缀,也可以是 ldaps:// 表示是通过 SSL 连接;
baseDn LDAP 服务器的登录用户名,必须是从根结点到用户节点的全路径(非必须);
bindPassword 登录该 LDAP 服务器的密码(非必须);
searchDn 查询用户数据的路径,类似数据库中的一张表的地址,注意这里也必须是全路径;
searchStandard 查询条件,这里是 mail 表示查询用户信息是通过邮箱信息来查询的。注意,该字段信息与LDAP数据库存储数据的字段相对应,如果如果存储用户邮箱信息的字段是 email, 这里就需要修改成 email.(1.3.18+支持)自定义filter表达式,基本形式为:&(objectClass=user)(cn=%s), 其中%s会被username替换
emailPostfix 登陆邮箱后缀(非必须)
emailKey: ldap数据库存放邮箱信息的字段(v1.3.21 新增 非必须)
usernameKey: ldap数据库存放用户名信息的字段(v1.3.21 新增 非必须)
然后重启。
禁止注册也是上面的文件,添加后重启yapi
{
  "port": "*****",
  "closeRegister":true
}
版本通知,同上
{
  "port": "******",
  "adminAccount": "*****",
  "versionNotify": true
}
配置mongodb集群
{
  "port": "***",
  "db": {
    "connectString": "mongodb://127.0.0.100:8418,127.0.0.101:8418,127.0.0.102:8418/yapidb?slaveOk=true",
    "user": "******",
    "pass": "******"
  },
}
后面的相关配置是在官网上看到的,没有配置。主要这个环境是公司内部使用,所以要求不是很高,有很多东西都没有试验。不过功能还是比较全的,接口的管理是够用了,如果有什么不了解的,留言会一一回复。
您可以选择一种方式赞助本站
支付宝扫一扫赞助
微信钱包扫描赞助
赏