
简介
Tengine也是一个web服务,是由淘宝网发起,在nginx的基础上,针对大访问量网站的需求,添加了汗多高级功能和特性,目标是打造一个安全、高效的web平台。从2011年12月开始Tengine开始开源,Tengine团队开始积极地开放和维护着,到现在Tengine的核心团队来自于淘宝、搜狗等互联网。
安装
[root@wulaoer.org ~]# wget http://tengine.taobao.org/download/tengine.tar.gz
[root@wulaoer.org ~]# tar -zxf tengine.tar.gz
[root@wulaoer.org ~]# cd tengine-2.1.0/
[root@wulaoer.org tengine-2.1.0]# yum -y install zlib zlib-devel openssl openssl--devel pcre pcre-devel
[root@wulaoer.org tengine-2.1.0]# yum -y install openssl openssl-devel
[root@wulaoer.org tengine-2.1.0]# ./configure
...................................................................
Configuration summary
  + using system PCRE library
  + using system OpenSSL library
  + md5: using OpenSSL library
  + sha1: using OpenSSL library
  + using system zlib library
  + jemalloc library is disabled

  nginx path prefix: "/usr/local/nginx"
  nginx binary file: "/usr/local/nginx/sbin/nginx"
  nginx configuration prefix: "/usr/local/nginx/conf"
  nginx configuration file: "/usr/local/nginx/conf/nginx.conf"
  nginx pid file: "/usr/local/nginx/logs/nginx.pid"
  nginx error log file: "/usr/local/nginx/logs/error.log"
  nginx http access log file: "/usr/local/nginx/logs/access.log"
  nginx http client request body temporary files: "client_body_temp"
  nginx dso module path: "/usr/local/nginx/modules/"
  nginx http proxy temporary files: "proxy_temp"
  nginx http fastcgi temporary files: "fastcgi_temp"
  nginx http uwsgi temporary files: "uwsgi_temp"
  nginx http scgi temporary files: "scgi_temp"
[root@wulaoer.org tengine-2.1.0]# make
[root@wulaoer.org tengine-2.1.0]# make install
"./configure"后如果出现以上信息,说明Tengine已经配置完成。Tengine默认是安装在"/usr/local/nginx/"目录下的,如果想安装在其他目录下需要加参数"--prefix"后面跟指定的路径,也可以使用"./configure --help"可以查看其他的参数。
配置
我们需要先关闭防火墙,免得测试访问失败,Tengine是在nginx的基础上开发的,所以配置和nginx是一样的,我们先启动它,然后加入到开启自启动。
[root@wulaoer.org conf]# vim /etc/profile.d/tengine.sh
export PATH=/usr/local/nginx/sbin:$PATH
[root@wulaoer.org ~]# chkconfig nginx on
[root@wulaoer.org ~]# service nginx restart
Restarting nginx (via systemctl):                          [  确定  ]
也可以使用init.d目录下的nginx启动,先创建一个shell脚本
[root@wulaoer.org ~]# cat /etc/init.d/nginx
#!/bin/bash
#
# nginx - this script starts and stops the nginx daemon
#
# chkconfig: - 85 15
# description: Nginx is an HTTP(S) server, HTTP(S) reverse
# proxy and IMAP/POP3 proxy server
# processname: nginx
# config: /etc/nginx/nginx.conf
# config: /etc/sysconfig/nginx
# pidfile: /var/run/nginx.pid

# Source function library.
. /etc/rc.d/init.d/functions

# Source networking configuration.
. /etc/sysconfig/network

# Check that networking is up.
[ "$NETWORKING" = "no" ] && exit 0

TENGINE_HOME="/usr/local/nginx/"
nginx=$TENGINE_HOME"sbin/nginx"
prog=$(basename $nginx)

NGINX_CONF_FILE=$TENGINE_HOME"conf/nginx.conf"

[ -f /etc/sysconfig/nginx ] && /etc/sysconfig/nginx

lockfile=/var/lock/subsys/nginx

start() {
	[ -x $nginx ] || exit 5
	[ -f $NGINX_CONF_FILE ] || exit 6
	echo -n $"Starting $prog: "
	daemon $nginx -c $NGINX_CONF_FILE
	retval=$?
	echo
	[ $retval -eq 0 ] && touch $lockfile
	return $retval
}

stop() {
	echo -n $"Stopping $prog: "
	killproc $prog -QUIT
	retval=$?
	echo
	[ $retval -eq 0 ] && rm -f $lockfile
	return $retval
	killall -9 nginx
}

restart() {
	configtest || return $?
	stop
	sleep 1
	start
}

reload() {
	configtest || return $?
	echo -n $"Reloading $prog: "
	killproc $nginx -HUP
	RETVAL=$?
	echo
}

force_reload() {
	restart
}

configtest() {
	$nginx -t -c $NGINX_CONF_FILE
}

rh_status() {
	status $prog
}

rh_status_q() {
	rh_status >/dev/null 2>&1
}

case "$1" in
start)
	rh_status_q && exit 0
	$1
;;
stop)
	rh_status_q || exit 0
	$1
;;
restart|configtest)
	$1
;;
reload)
	rh_status_q || exit 7
	$1
;;
force-reload)
	force_reload
;;
status)
	rh_status
;;
condrestart|try-restart)
	rh_status_q || exit 0
;;
*)

echo $"Usage: $0 {start|stop|status|restart|condrestart|try-restart|reload|force-reload|configtest}"
exit 2
esac
然后给群建赋予执行权限,把防火墙关闭,访问一下看看是否能够访问成功。
[root@wulaoer.org ~]# chmod +x /etc/init.d/nginx
[root@wulaoer.org nginx]# systemctl stop firewalld
[root@wulaoer.org nginx]# systemctl disable firewalld
Removed symlink /etc/systemd/system/multi-user.target.wants/firewalld.service.
Removed symlink /etc/systemd/system/dbus-org.fedoraproject.FirewallD1.service.
测试
前面已经启动了服务,我们直接关闭了防火墙,如果是线上不能直接关闭防火墙,需要给防火墙开通一下80端口限制。
iptables -I INPUT 5 -i eth0 -p tcp --dport 80 -m state --state NEW,ESTABLISHED -j ACCEPT
service iptables save
service iptables restart
下面是浏览器访问的效果。
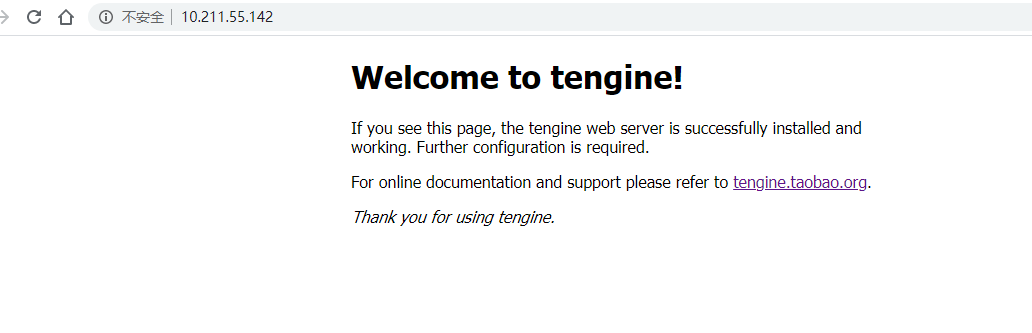
Tengine服务已经安装完成了,下面看看如何使用把。
您可以选择一种方式赞助本站
支付宝扫一扫赞助
微信钱包扫描赞助
赏