
上面已经安装过Elasticsearch,这里在从新安装一次,只是这次安装的版本不一样,最新版7.3.2.安装之前也需要安装java,因为Elasticsearch不能使用root运行,所以需要自己创建一个普通用户进行安装。java已经设置好了,下面直接安装。
部署环境
三个节点信息如下:
| 计算机名 | IP | 角色 |
|---|---|---|
| Server1 | 10.211.55.31 | master |
| Server2 | 10.211.55.32 | node1 |
| Server3 | 10.211.55.33 | node2 |
为了更好的理解Elasticsearch的集群,上面我们的角色先这样分配,任何一个节点都有可能是master节点,master节点主要负责管理范围内容的所有变更,例如:增加、删除索引、,或者增加、删除例程登。因此Elasticsearch集群只能被一个主实例占用,流量的增加也不会被代替。
Elasticsearch集群部署
环境设置
[root@Server1 ~]# vim /etc/security/limits.conf
...............
* soft nofile 65537
* hard nofile 65537
* soft nproc 65537
* hard nproc 65537
* soft memlock unlimited
* hard memlock unlimited
[root@Server1 ~]# vim /etc/sysctl.conf
vm.max_map_count = 262144
net.core.somaxconn = 65535
net.ipv4.ip_forward = 1
vm.swappiness=0
创建用户
useradd elast
下载文件,并解压赋予权限:
 [root@Server1 ~]# wget https://artifacts.elastic.co/downloads/elasticsearch/elasticsearch-7.3.2-linux-x86_64.tar.gz
 [root@Server1 ~]# tar -zxf elasticsearch-7.3.2-linux-x86_64.tar.gz
[root@Server1 ~]# mv elasticsearch-7.3.2 /opt/elasticsearch
[root@Server1 ~]# mkdir /opt/elasticsearch/data
[root@Server1 ~]# chown -R elast:elast /opt/elasticsearch
其他节点也要创建用户,并下载文件,解压赋予权限等操作。
master配置elasticsearch.yml
[root@Server1 ~]# cd /opt/elasticsearch/config/
[root@Server1 config]# vim elasticsearch.yml
# ======================== Elasticsearch Configuration =========================
#
# NOTE: Elasticsearch comes with reasonable defaults for most settings.
#       Before you set out to tweak and tune the configuration, make sure you
#       understand what are you trying to accomplish and the consequences.
#
# The primary way of configuring a node is via this file. This template lists
# the most important settings you may want to configure for a production cluster.
#
# Please consult the documentation for further information on configuration options:
# https://www.elastic.co/guide/en/elasticsearch/reference/index.html
#
# ---------------------------------- Cluster -----------------------------------
#
# Use a descriptive name for your cluster:
#设置集群名称,集群内所有节点的名称必须一致。
cluster.name: wulaoer.org
#
# ------------------------------------ Node ------------------------------------
#
# Use a descriptive name for the node:
#设置节点名称,集群内节点名称必须唯一。
node.name: Server1
# 表示该节点会不会作为主节点,true表示会;false表示不会
node.master:
# 当前节点是否用于存储数据,是:true、否:false
node.data: true
# Add custom attributes to the node:
#
node.attr.rack: r1
#
# ----------------------------------- Paths ------------------------------------
#
# Path to directory where to store the data (separate multiple locations by comma):
# 索引数据存放的位置
path.data: /opt/elasticsearch/data
#
#Path to log files:
# 日志文件存放的位置
path.logs: /opt/elasticsearch/logs
#
# ----------------------------------- Memory -----------------------------------
#
# Lock the memory on startup:
# 需求锁住物理内存,是:true、否:false
bootstrap.memory_lock: true
#解决centos6不支持的问题
bootstrap.system_call_filter: true
#
# Make sure that the heap size is set to about half the memory available
# on the system and that the owner of the process is allowed to use this
# limit.
#
# Elasticsearch performs poorly when the system is swapping the memory.
#
# ---------------------------------- Network -----------------------------------
#
# Set the bind address to a specific IP (IPv4 or IPv6):
# 监听地址,用于访问该es
network.host: 10.211.55.31
#
# Set a custom port for HTTP:
# es对外提供的http端口,默认 9200
http.port: 9200
# TCP的默认监听端口,默认 9300
transport.tcp.port: 9300
# For more information, consult the network module documentation.
#
# --------------------------------- Discovery ----------------------------------
#
# Pass an initial list of hosts to perform discovery when this node is started:
# The default list of hosts is ["127.0.0.1", "[::1]"]
# es7.x 之后新增的配置,写入候选主节点的设备地址,在开启服务后可以被选为主节点
discovery.seed_hosts: ["10.211.55.31:9300", "10.211.55.32:9300", "10.211.55.33:9300"]
# Bootstrap the cluster using an initial set of master-eligible nodes:
# es7.x 之后新增的配置,初始化一个新的集群时需要此配置来选举master
cluster.initial_master_nodes: ["10.211.55.31", "10.211.55.32", "10.211.55.33"]
# 是否支持跨域,是:true,在使用head插件时需要此配置
http.cors.enabled: true
# “*” 表示支持所有域名
http.cors.allow-origin: "*"
action.destructive_requires_name: true
action.auto_create_index: .security,.monitoring*,.watches,.triggered_watches,.watcher-history*
xpack.security.enabled: false
xpack.monitoring.enabled: true
xpack.graph.enabled: false
xpack.watcher.enabled: false
xpack.ml.enabled: false

# For more information, consult the discovery and cluster formation module documentation.
#
# ---------------------------------- Gateway -----------------------------------
#
# Block initial recovery after a full cluster restart until N nodes are started:
#
gateway.recover_after_nodes: 3
#
# For more information, consult the gateway module documentation.
#
# ---------------------------------- Various -----------------------------------
#
# Require explicit names when deleting indices:
#
action.destructive_requires_name: true

discovery.zen.ping_timeout: 200s
discovery.zen.fd.ping_timeout: 200s
discovery.zen.fd.ping_interval: 30s
discovery.zen.fd.ping_retries: 5
node1配置elasticsearch.yml
[root@Server2 ~]# cd /opt/elasticsearch/config/
[root@Server2 config]# vim elasticsearch.yml
# ======================== Elasticsearch Configuration =========================
#
# NOTE: Elasticsearch comes with reasonable defaults for most settings.
#       Before you set out to tweak and tune the configuration, make sure you
#       understand what are you trying to accomplish and the consequences.
#
# The primary way of configuring a node is via this file. This template lists
# the most important settings you may want to configure for a production cluster.
#
# Please consult the documentation for further information on configuration options:
# https://www.elastic.co/guide/en/elasticsearch/reference/index.html
#
# ---------------------------------- Cluster -----------------------------------
#
# Use a descriptive name for your cluster:
#设置集群名称,集群内所有节点的名称必须一致。
cluster.name: wulaoer.org
#
# ------------------------------------ Node ------------------------------------
#
# Use a descriptive name for the node:
#设置节点名称,集群内节点名称必须唯一。
node.name: Server2
# 表示该节点会不会作为主节点,true表示会;false表示不会
node.master:
# 当前节点是否用于存储数据,是:true、否:false
node.data: true
# Add custom attributes to the node:
#
node.attr.rack: r1
#
# ----------------------------------- Paths ------------------------------------
#
# Path to directory where to store the data (separate multiple locations by comma):
# 索引数据存放的位置
path.data: /opt/elasticsearch/data
#
#Path to log files:
# 日志文件存放的位置
path.logs: /opt/elasticsearch/logs
#
# ----------------------------------- Memory -----------------------------------
#
# Lock the memory on startup:
# 需求锁住物理内存,是:true、否:false
bootstrap.memory_lock: true
#解决centos6不支持的问题
bootstrap.system_call_filter: true
#
# Make sure that the heap size is set to about half the memory available
# on the system and that the owner of the process is allowed to use this
# limit.
#
# Elasticsearch performs poorly when the system is swapping the memory.
#
# ---------------------------------- Network -----------------------------------
#
# Set the bind address to a specific IP (IPv4 or IPv6):
# 监听地址,用于访问该es
network.host: 10.211.55.32
#
# Set a custom port for HTTP:
# es对外提供的http端口,默认 9200
http.port: 9200
# TCP的默认监听端口,默认 9300
transport.tcp.port: 9300
# For more information, consult the network module documentation.
#
# --------------------------------- Discovery ----------------------------------
#
# Pass an initial list of hosts to perform discovery when this node is started:
# The default list of hosts is ["127.0.0.1", "[::1]"]
# es7.x 之后新增的配置,写入候选主节点的设备地址,在开启服务后可以被选为主节点
discovery.seed_hosts: ["10.211.55.31:9300", "10.211.55.32:9300", "10.211.55.33:9300"]
# Bootstrap the cluster using an initial set of master-eligible nodes:
# es7.x 之后新增的配置,初始化一个新的集群时需要此配置来选举master
cluster.initial_master_nodes: ["10.211.55.31", "10.211.55.32", "10.211.55.33"]
# 是否支持跨域,是:true,在使用head插件时需要此配置
http.cors.enabled: true
# “*” 表示支持所有域名
http.cors.allow-origin: "*"
action.destructive_requires_name: true
action.auto_create_index: .security,.monitoring*,.watches,.triggered_watches,.watcher-history*
xpack.security.enabled: false
xpack.monitoring.enabled: true
xpack.graph.enabled: false
xpack.watcher.enabled: false
xpack.ml.enabled: false

# For more information, consult the discovery and cluster formation module documentation.
#
# ---------------------------------- Gateway -----------------------------------
#
# Block initial recovery after a full cluster restart until N nodes are started:
#
gateway.recover_after_nodes: 3
#
# For more information, consult the gateway module documentation.
#
# ---------------------------------- Various -----------------------------------
#
# Require explicit names when deleting indices:
#
action.destructive_requires_name: true

discovery.zen.ping_timeout: 200s
discovery.zen.fd.ping_timeout: 200s
discovery.zen.fd.ping_interval: 30s
discovery.zen.fd.ping_retries: 5
node2配置elasticsearch.yml
[root@Server3 ~]# cd /opt/elasticsearch/config/
[root@Server3 config]# vim elasticsearch.yml
# ======================== Elasticsearch Configuration =========================
#
# NOTE: Elasticsearch comes with reasonable defaults for most settings.
#       Before you set out to tweak and tune the configuration, make sure you
#       understand what are you trying to accomplish and the consequences.
#
# The primary way of configuring a node is via this file. This template lists
# the most important settings you may want to configure for a production cluster.
#
# Please consult the documentation for further information on configuration options:
# https://www.elastic.co/guide/en/elasticsearch/reference/index.html
#
# ---------------------------------- Cluster -----------------------------------
#
# Use a descriptive name for your cluster:
#设置集群名称,集群内所有节点的名称必须一致。
cluster.name: wulaoer.org
#
# ------------------------------------ Node ------------------------------------
#
# Use a descriptive name for the node:
#设置节点名称,集群内节点名称必须唯一。
node.name: Server3
# 表示该节点会不会作为主节点,true表示会;false表示不会
node.master:
# 当前节点是否用于存储数据,是:true、否:false
node.data: true
# Add custom attributes to the node:
#
node.attr.rack: r1
#
# ----------------------------------- Paths ------------------------------------
#
# Path to directory where to store the data (separate multiple locations by comma):
# 索引数据存放的位置
path.data: /opt/elasticsearch/data
#
#Path to log files:
# 日志文件存放的位置
path.logs: /opt/elasticsearch/logs
#
# ----------------------------------- Memory -----------------------------------
#
# Lock the memory on startup:
# 需求锁住物理内存,是:true、否:false
bootstrap.memory_lock: true
#解决centos6不支持的问题
bootstrap.system_call_filter: true
#
# Make sure that the heap size is set to about half the memory available
# on the system and that the owner of the process is allowed to use this
# limit.
#
# Elasticsearch performs poorly when the system is swapping the memory.
#
# ---------------------------------- Network -----------------------------------
#
# Set the bind address to a specific IP (IPv4 or IPv6):
# 监听地址,用于访问该es
network.host: 10.211.55.33
#
# Set a custom port for HTTP:
# es对外提供的http端口,默认 9200
http.port: 9200
# TCP的默认监听端口,默认 9300
transport.tcp.port: 9300
# For more information, consult the network module documentation.
#
# --------------------------------- Discovery ----------------------------------
#
# Pass an initial list of hosts to perform discovery when this node is started:
# The default list of hosts is ["127.0.0.1", "[::1]"]
# es7.x 之后新增的配置,写入候选主节点的设备地址,在开启服务后可以被选为主节点
discovery.seed_hosts: ["10.211.55.31:9300", "10.211.55.32:9300", "10.211.55.33:9300"]
# Bootstrap the cluster using an initial set of master-eligible nodes:
# es7.x 之后新增的配置,初始化一个新的集群时需要此配置来选举master
cluster.initial_master_nodes: ["10.211.55.31", "10.211.55.32", "10.211.55.33"]
# 是否支持跨域,是:true,在使用head插件时需要此配置
http.cors.enabled: true
# “*” 表示支持所有域名
http.cors.allow-origin: "*"
action.destructive_requires_name: true
action.auto_create_index: .security,.monitoring*,.watches,.triggered_watches,.watcher-history*
xpack.security.enabled: false
xpack.monitoring.enabled: true
xpack.graph.enabled: false
xpack.watcher.enabled: false
xpack.ml.enabled: false

# For more information, consult the discovery and cluster formation module documentation.
#
# ---------------------------------- Gateway -----------------------------------
#
# Block initial recovery after a full cluster restart until N nodes are started:
#
gateway.recover_after_nodes: 3
#
# For more information, consult the gateway module documentation.
#
# ---------------------------------- Various -----------------------------------
#
# Require explicit names when deleting indices:
#
action.destructive_requires_name: true

discovery.zen.ping_timeout: 200s
discovery.zen.fd.ping_timeout: 200s
discovery.zen.fd.ping_interval: 30s
discovery.zen.fd.ping_retries: 5
启动服务
[elast@Server1 ~]$ cd /opt/elasticsearch/bin/
[elast@Server1 bin]$ ./elasticsearch -d

[elast@Server2 ~]$ cd /opt/elasticsearch/bin/
[elast@Server2 bin]$ ./elasticsearch -d

[elast@Server3 ~]$ cd /opt/elasticsearch/bin/
[elast@Server3 bin]$ ./elasticsearch -d
验证一下集群状态
[elast@Server1 bin]$ curl http://10.211.55.31:9200
{
  "name" : "Server1",
  "cluster_name" : "wulaoer.org",
  "cluster_uuid" : "Gd690EzhT1y-uoTcaIZLgQ",
  "version" : {
    "number" : "7.3.2",
    "build_flavor" : "default",
    "build_type" : "tar",
    "build_hash" : "1c1faf1",
    "build_date" : "2019-09-06T14:40:30.409026Z",
    "build_snapshot" : false,
    "lucene_version" : "8.1.0",
    "minimum_wire_compatibility_version" : "6.8.0",
    "minimum_index_compatibility_version" : "6.0.0-beta1"
  },
  "tagline" : "You Know, for Search"
}
[elast@Server1 bin]$ curl http://10.211.55.32:9200
{
  "name" : "Server2",
  "cluster_name" : "wulaoer.org",
  "cluster_uuid" : "Gd690EzhT1y-uoTcaIZLgQ",
  "version" : {
    "number" : "7.3.2",
    "build_flavor" : "default",
    "build_type" : "tar",
    "build_hash" : "1c1faf1",
    "build_date" : "2019-09-06T14:40:30.409026Z",
    "build_snapshot" : false,
    "lucene_version" : "8.1.0",
    "minimum_wire_compatibility_version" : "6.8.0",
    "minimum_index_compatibility_version" : "6.0.0-beta1"
  },
  "tagline" : "You Know, for Search"
}
[elast@Server1 bin]$ curl http://10.211.55.33:9200
{
  "name" : "Server3",
  "cluster_name" : "wulaoer.org",
  "cluster_uuid" : "Gd690EzhT1y-uoTcaIZLgQ",
  "version" : {
    "number" : "7.3.2",
    "build_flavor" : "default",
    "build_type" : "tar",
    "build_hash" : "1c1faf1",
    "build_date" : "2019-09-06T14:40:30.409026Z",
    "build_snapshot" : false,
    "lucene_version" : "8.1.0",
    "minimum_wire_compatibility_version" : "6.8.0",
    "minimum_index_compatibility_version" : "6.0.0-beta1"
  },
  "tagline" : "You Know, for Search"
}
[elast@Server1 bin]$
查看集群主从分配
[elast@Server1 ~]$ curl http://10.211.55.32:9200/_cat/nodes?v
ip           heap.percent ram.percent cpu load_1m load_5m load_15m node.role master name
10.211.55.32           14          97   0    0.00    0.03     0.07 dim       *      Server2
10.211.55.31           17          95   0    0.04    0.03     0.05 dim       -      Server1
10.211.55.33           10          95   0    0.04    0.07     0.09 dim       -      Server3
验证一下关闭master节点之后是否有从节点接替master节点
[elast@Server1 ~]$ curl http://10.211.55.31:9200/_cat/nodes?v
ip           heap.percent ram.percent cpu load_1m load_5m load_15m node.role master name
10.211.55.31           19          95   0    0.01    0.02     0.05 dim       -      Server1
10.211.55.33           13          95   0    0.01    0.05     0.09 dim       *      Server3
[elast@Server1 ~]$
查看集群状态
[elast@Server1 ~]$ curl http://10.211.55.32:9200/_cluster/health?pretty
{
  "cluster_name" : "wulaoer.org",
  "status" : "green",
  "timed_out" : false,
  "number_of_nodes" : 3,
  "number_of_data_nodes" : 3,
  "active_primary_shards" : 0,
  "active_shards" : 0,
  "relocating_shards" : 0,
  "initializing_shards" : 0,
  "unassigned_shards" : 0,
  "delayed_unassigned_shards" : 0,
  "number_of_pending_tasks" : 0,
  "number_of_in_flight_fetch" : 0,
  "task_max_waiting_in_queue_millis" : 0,
  "active_shards_percent_as_number" : 100.0
}
[elast@Server1 ~]$
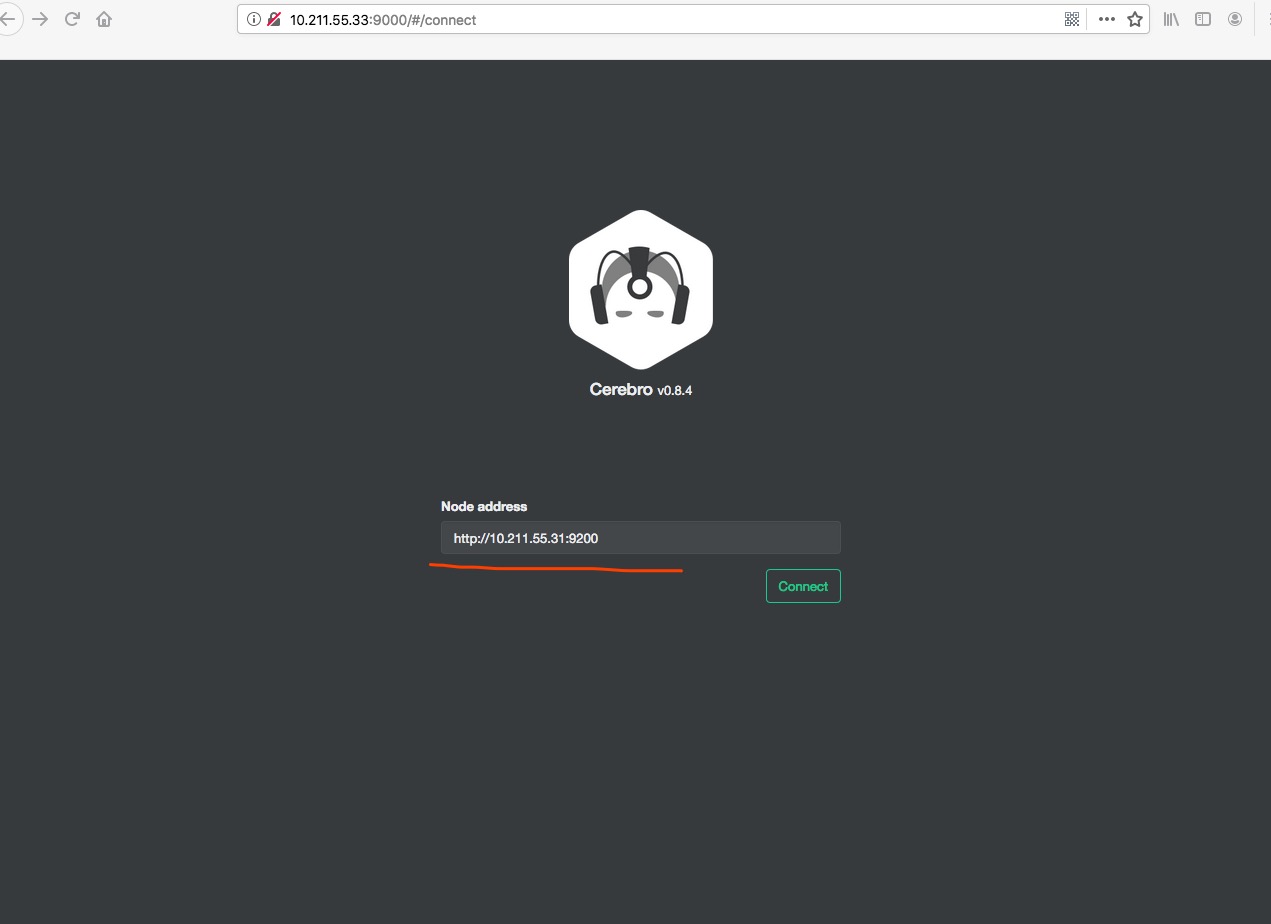
cerebro监控
文件地址:https://github.com/lmenezes/cerebro/releases
[root@Server3 ~]# tar -xivf cerebro-0.8.4.tgz -C /opt/
[root@Server3 opt]# mv cerebro-0.8.4 cerebro
[root@Server3 opt]# cd cerebro/bin/
[root@Server3 bin]# ./cerebro &
[1] 13953
[root@Server3 bin]# [info] play.api.Play - Application started (Prod) (no global state)
[info] p.c.s.AkkaHttpServer - Listening for HTTP on /0:0:0:0:0:0:0:0:9000
使用浏览器查看一下
在server3节点上创建一个student.json文件,并写入内容:
[elast@Server3 data]$ cat student.json
{"index":{"_id":"1"}} {"title":"许宝江","url":"7254863","chineseName":"许宝江","sex":"男","occupation":" 滦县农业局局长","nationality":"中国"} {"index":{"_id":"2"}} {"title":"鲍志成","url":"2074015","chineseName":"鲍志成","occupation":"医师","nationality":"中国","birthDate":"1901年","deathDate":"1973年","graduatedFrom":"香港大学"}
把新建的文件导入到es中
[elast@Server3 data]$ curl -H "Content-Type: application/json" -XPOST '10.211.55.31:9200/es/student/_bulk?pretty&refresh' --data-binary "@student.json"
Elasticsearch设置权限
安装x-pack工具
[elast@Server3 elasticsearch]$ ./bin/elasticsearch-plugin install x-pack
kibana安装
下载文件,并解压
https://github.com/elastic/kibana/releases
https://www.elastic.co/cn/downloads/kibana
[root@Server3 ~]# wget https://artifacts.elastic.co/downloads/kibana/kibana-7.3.2-linux-x86_64.tar.gz
[root@Server3 ~]# mv kibana-7.3.2-linux-x86_64 /opt/kibana
[root@Server3 ~]# cd /opt/kibana/config/
配置kibana
[root@Server3 config]# vim kibana.yml
报错信息:
[info][optimize] Optimizing and caching bundles for graph, monitoring, space_selector, ml, dashboardViewer, apm, code, maps, canvas, infra, siem, uptime, kibana, stateSessionStorageRedirect, status_page and timelion. This may take a few minutes
浏览器报错信息提示版本不对,
增加内容和cpu之后启动正常。
http://10.211.55.31:9200/_cat/health?v
您可以选择一种方式赞助本站
支付宝扫一扫赞助
微信钱包扫描赞助
赏